![]()
The Clips app is an easy-to-use and free video editing app created by Apple that works on iPhone, iPad and iPod Touch, but not on Android devices. Also, you need a device with iOS 13 or later to use the Clips app. You can use videos and photos from your recordings, selfie, or photos as input material, add effects such as filters, live titles, text, emojis and stickers, add music from your music library and create MOV video. You can save created video on your device or upload it to YouTube or other video editing apps.
However, you can only add unprotected music format from your library. If you have subscribed Apple Music, the downloaded Apple Music songs will not be displayed. If you want to add your favorite Apple Music songs as background music for Clips app project, use TuneKeep Audio Converter to convert Apple Music songs to MP3, M4A, WAV, etc. and then transfer them to iPhone/iPad.
A Brief Introduction to How to Use the Clips App
On your iPhone, iPad or iPod Touch, tap the Clips app to launch it and you'll see a red record button at the bottom of the screen. You need to press and hold to record. Alternatively, you can switch between normal recording and selfie by tapping the camera toggle button. If you don't want to press and hold, you can wipe the record button up to lock it. And you can stop recording/selfie by tapping the button again. Recorded selfie videos are displayed in the timeline at the bottom.

First, let's recognize the button on the screen of the Clips app. The upper left button is the project button. The two buttons on the top right are aspect ratio and music. To the left of the record button is the library button, and to the right is the effect button. The lower left button is the play button. The bottom right button is the create button.
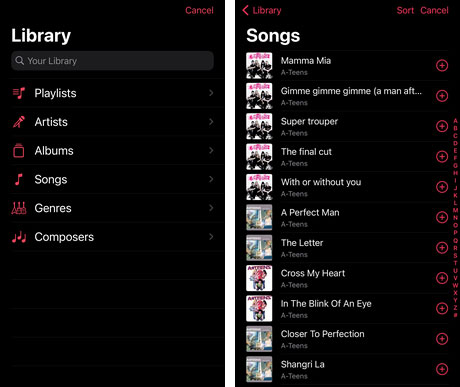
By tapping the project button, you can load an existing project or create a new one. By tapping the aspect ratio button, you can select 16: 9, 4: 3 and square. If you tap the music button, you will see 3 tabs which are None, Soundtracks and My Music. Tap None if you don't want to add music. Tap Soundtracks and you can download what Apple has prepared for you. Tap My Music to add music from your library as background music to your Clips app project.
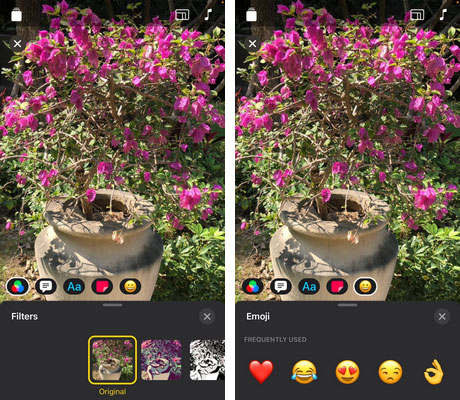
After adding the music, you will go back to the main screen of the Clips app. After tapping the library button, you can select photos and videos in the iPhone Photos app to add them to your timeline. Of course, you can change the music again after adding new material. Tap the effect button to see filters, live titles, text, emojis and stickers. There are several filters available that you can tap to apply. When you tap the live title, "Talk during recording to add text" is displayed. Text allows you to add different styles of text. Of course, you can change it to any text you like. You can also use the built-in items with Emoji and stickers. The image below is a screen of filters and Emoji
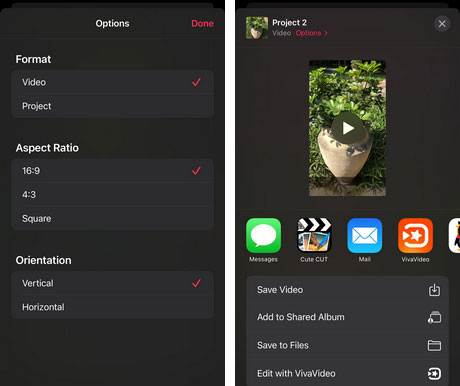
When you're done editing, you can go back to the main screen and tap the play button to preview. Alternatively, you can tap the create button to create a local MOV video or share it to YouTube or other apps. You can change the format (video, project), aspect ratio and orientation (landscape, portrait), etc. by tapping the option on the creation screen. You can change the name of the project on the project management screen.
Creating videos with the Clips app is not difficult. The biggest challenge is that you can't add your favorite Apple Music songs to your Clips app as background music. However, with TuneKeep Audio Converter, you can easily solve this difficult problem.
TuneKeep Audio Converter: Solution to Add Apple Music to Clips App
TuneKeep Audio Converter is a software solution that can convert Apple Music songs in your library to general-purpose music formats such as MP3, M4A, WAV, AIFF, etc. in cooperation with iTunes or music app. After converting to MP3, M4A, WAV, etc. that can be added to iTunes/Music app and transferring to iPhone/iPad, you can use it for Clips app.
TuneKeep Audio Converter Features List
- Convert Apple Music songs to MP3, M4A, WAV, AIFF that can be added to Clips app
- Losslessly Convert 256kbps Apple Music songs to 320kbps MP3 or 256kbsp M4A
- Keep ID3 tags like song title, artist, album, genre, track number and artwork
- Rename output files in bulk by title, artist, album, track number, hyphen, space, etc.
- Sort output files into folders by artist, album, artist/album or album/artist.
- Convert 16X faster on Windows or Mac 10.9.5 - 10.12.6, 1X speed on Mac 10.13 and later
- Convert Apple Music songs added to library without downloading under stable internet
- Compatible with the latest versions of Windows, macOS, iTunes and Music app
Convert Apple Music Songs to MP3/M4A and Use as Background Music in Clips App
TuneKeep Audio Converter is not a complicated software program. With just a few clicks, you can convert Apple Music songs to all-purpose MP3, M4A, WAV and more. Moreover, the entire song information can be retained. Please refer to the steps below to learn how to use Apple Music songs for Clips App as background music.
Step 1: Launch Audio Converter
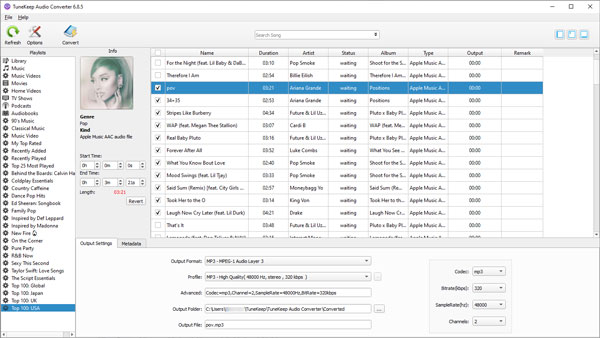
When you launch TuneKeep Audio Converter, iTunes or music app (Mac 10.15 Catalina or later) will also be launched automatically. Playlists in the iTunes/Music app are also automatically loaded and displayed in the left panel. Please do not operate iTunes or Music app during the conversion. Before the conversion is done, please do not close iTunes or Music app.
Step 2: Select Apple Music Songs
You can select songs by selecting a playlist in the left panel and checking the song checkboxes. You can select the entire playlist by ticking the top checkbox of the playlist. You can also search for song title, artist, or album in the built-in search box to quickly find songs that meet your criteria.

Step 3: Select a Music Format Compatible with the Clips App
TuneKeep Audio Converter has prepared output formats such as MP3, M4A, WAV, AIFF, FLAC, AAC, AU. Clips app can load songs from the iPhone/iPad music library, so the output format should be the one which can be played by iPhone/iPad Music app. So the format you can choose is MP3, M4A, WAV or AIFF. Here, we use MP3 as example.
If necessary, you can click Options to specify the volume of the output files and how to rename and organize them.
Step 4: Start Apple Music MP3 Converter
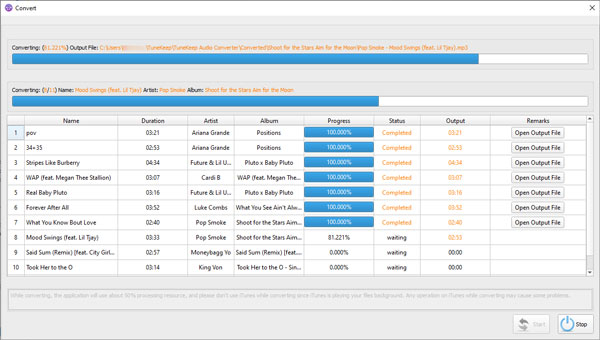
When you're ready, click the "Convert" button to start converting Apple Music songs. After the conversion is complete, click the "Open Output File" button to display the output destination.
Step 5: Transfer to iPhone/iPad
Now you can add the output MP3, M4A or WAV files to the iTunes/Music app library and sync them to your iPhone/iPad, then you can achieve the purpose of adding Apple Music songs to Clips app as background music.
If you are using both Clips app and Apple Music, and want to add your favorite Apple Music songs to Clips app as background music, please use TuneKeep Audio Converter. Of course, if you convert Apple Music songs to MP3, M4A and transfer them to your iPhone/iPad, you can not only use in Clips app, but also use them in various video editing software such as iMovie and VivaVideo.